Guides
How to turn your website into an AI chatbot in minutes
A step-by-step guide to training an AI chatbot on your website content: crawl your pages, add documents, test answers, customise the widget and embed it.
On this page
Turning your website into an AI chatbot means pointing a chatbot platform at your URL, letting it read and index your pages, and publishing an assistant that answers visitor questions from that content. With Chyt.ai you can have a first working version in a single sitting: create the chatbot, add your website as a knowledge source, test it in Preview, and paste one embed snippet into your site.
This guide walks through the real steps, the checks worth doing before launch, and how to keep the chatbot accurate as your site changes.
What does "training a chatbot on your website" actually mean?
It does not mean retraining an AI model. A website-trained chatbot uses retrieval-augmented generation: your pages are split into searchable chunks, the most relevant chunks are found for each question, and the AI model writes an answer grounded in them, with source citations. That is why people call it a "custom ChatGPT for my website": the conversational ability comes from the model, the facts come from you.
The practical consequence: the chatbot can only be as good as the content it can read. If a fact is not on your site or in a document you upload, no setting will supply it reliably. Our plain-language explainer on how a RAG chatbot works covers the mechanics.
What you need before you start
- A public website URL beginning with https://. Pages behind a login, or pages that block automated access, may not be available to the crawler.
- A one-line description of the chatbot's job, for example "answer pre-sales and support questions about our products".
- Any documents that hold answers your website does not: a policy PDF, a product guide, a price list.
- Permission to edit your website's HTML or its custom-code settings, if you plan to embed the widget.
Step 1: Create the chatbot
- Sign in, open Chatbots and select Create New Chatbot.
- Choose a starting point. Build from Scratch lets you review every setting. AI Quick Start asks for a business description, industry and tone, then proposes a name, description and system prompt for you to review. From Template gives you a starting configuration to customise.
- Enter a Name, an optional Description, and a System Prompt that explains the assistant's role and boundaries.
- Select Next to create the chatbot and move on to knowledge sources.
A useful system prompt is short and honest about limits: tell the assistant to use the provided knowledge, and to say so and point to your real support route when a detail is missing. Generated or templated setups still need a factual review; a template does not know your policies.
Step 2: Add your website as a knowledge source
- In Add Knowledge Sources, select Add Source → Website URL.
- Enter the Website URL and an optional Source name.
- Set Max pages to crawl (1–500). Your workspace's resource allowance also applies.
- Turn on Include subdomains only if content on a blog or docs subdomain belongs in this chatbot.
- Add Exclude patterns for paths that should be left out, such as an admin area or an archive of old posts.
- Pick a Sync Schedule: No auto-sync, Daily, Weekly or Monthly.
- Select Add source and watch the source move through Pending, Crawling and Processing to Ready.
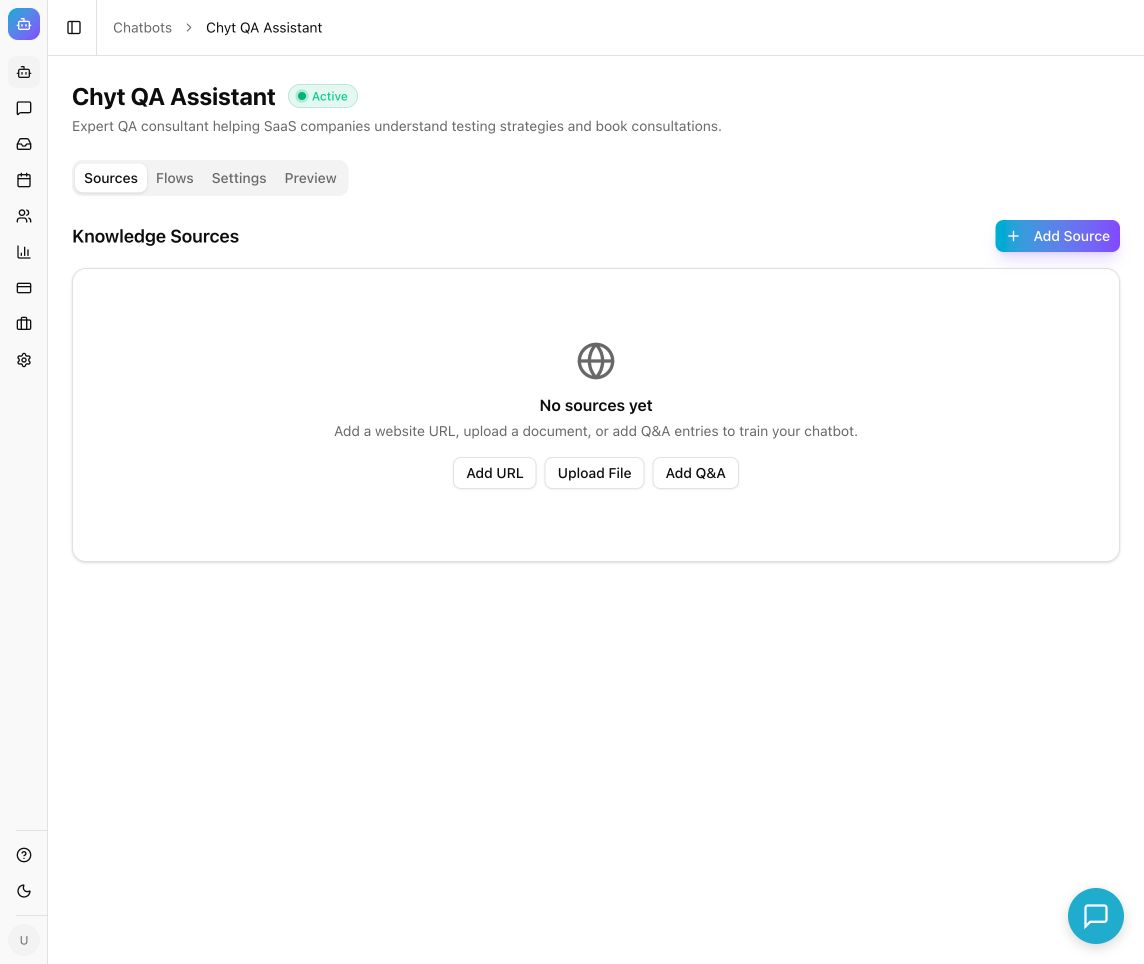
Start with a small, focused crawl. A tight scope of product, pricing, policy and FAQ pages is easier to diagnose than five hundred mixed pages, and excluding unrelated material tends to improve relevance. "Ready" means processing finished; it does not mean every page on your domain was imported, so check the page and chunk counts. The website sources guide covers each field in detail.
Step 3: Upload the documents your website does not cover
Most businesses keep some answers outside the website. In Add Source → Upload File, the upload dialog accepts PDF, DOCX, TXT, CSV and XLSX files up to 50 MB each, one file at a time. Use files with selectable text and clear headings; an image-only scan may not produce a complete searchable document.
For short, high-stakes facts — opening hours, return windows, eligibility rules — add Q&A Entries: approved question-and-answer pairs that give the chatbot a concise, authoritative source. Connectors such as Notion, Confluence and Google Drive are available when you want to go beyond the website.
Step 4: Test in Preview before anyone else does
The wizard's Preview step is where you find out whether the chatbot is ready. Ask at least three kinds of question:
- One that a source answers directly.
- The same question phrased differently.
- One that is outside the chatbot's scope.
Check that factual answers match your source and that the assistant handles missing information sensibly instead of inventing a policy. Inspect the cited sources and compare them with the original page. If the required fact was never imported, fix the source first; tuning search or changing the model will not supply it.
Step 5: Set the persona and customise the widget
In Settings → Persona, the Persona Builder sets the assistant's name, tagline, vocabulary level, formality, response length and traits, plus allowed and prohibited topics. Knowledge sources provide the facts; persona guides style and behaviour. Persona boundaries are instructions to the model, not access controls.
In Settings → Widget, choose a light or dark theme, bottom-right or bottom-left position, brand colour, launcher icon, optional avatar and a short welcome message. Add up to four starter questions so visitors see what the chatbot is good at, and choose the widget language for interface labels. Check that your brand colour stays readable in the preview.
Step 6: Publish the widget or a hosted chat page
- Select Deploy & Go Live in the wizard, or open Settings → Deploy later and confirm the status is active.
- Under Deployment Channels, enable Website Widget, Standalone App, or both, and select Save Channels.
- For the widget, copy the Embed Code and paste it before the closing body tag of your site, or into your platform's site-wide custom script area. Add it once per page.
- For a hosted chat page, copy the Standalone App link and share it. Review the public access setting if anyone with the link should be able to chat.
- Open the published experience as a visitor and send a real test question.
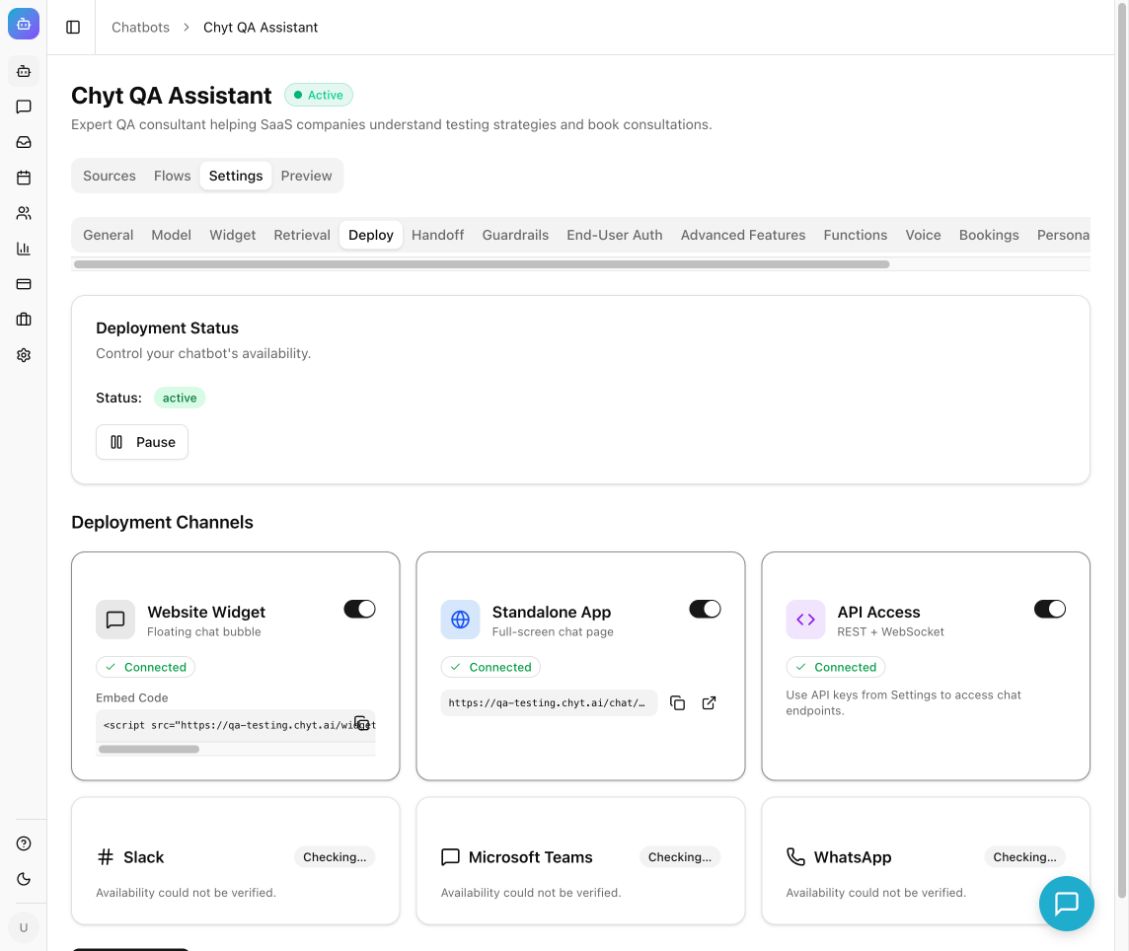
Use the exact snippet generated for this chatbot, because it contains the chatbot's ID. The "Connected" badge in the dashboard means the channel is enabled; only a visitor test proves your site has the snippet installed correctly.
Pre-launch checklist
- Every source shows Ready with a sensible page or chunk count.
- Ten to twenty real customer questions have been tested, including paraphrases.
- An out-of-scope question gets an honest "I do not have that" with a real contact route.
- Old or contradictory policy pages and documents have been removed or excluded.
- Greeting, starter questions and brand colour look right on desktop and on a narrow mobile screen.
- The widget appears on your live site and answers a test question.
- If you want a route to a person, human handoff is configured and someone is watching the inbox.
How do you keep the chatbot's content fresh?
A chatbot trained on last quarter's website will confidently quote last quarter's prices. Three habits prevent that:
- Schedule re-crawls. Set the website source's sync schedule to daily, weekly or monthly. Scheduled updates are periodic, so an edit to your site is not guaranteed to appear in answers immediately.
- Re-sync after important changes. Use the source's Re-sync action after a pricing or policy update, then check Sync history for status, pages, changes and errors, and retest the affected questions.
- Replace documents explicitly. Re-syncing an uploaded file does not fetch a new version from your computer. Upload the revised file, verify it, then delete the old one.
What should you measure after launch?
Open Analytics and pick a consistent period. The most useful signals are:
- Knowledge gaps and top intents — the questions visitors ask that your content does not answer well. Each one is a page to write or a Q&A pair to add.
- Satisfaction and feedback on individual answers.
- Conversation transcripts. Read a sample every week. When an answer is wrong, use Correct this answer and retest the question and a paraphrase.
- Handoffs, if enabled. Note that an AI-contained conversation means no handoff was recorded, not that the visitor's issue was definitely resolved.
If visitors also need fixed journeys — a quote request, a booking, a triage menu — add a guided flow alongside the AI answers. Our comparison of deterministic and AI chatbots explains when each fits.
Next steps
You can see the approach working on your own content before committing: try the demo with your website URL, or create a free trial workspace and follow the first chatbot walkthrough. Plans are flat monthly prices rather than per-message fees.
Frequently asked questions
- How do I turn my website into an AI chatbot?
- Give a chatbot platform your website URL, let it crawl and index the pages, test the answers against your own content, and then embed a widget on your site. In Chyt.ai the steps are: create a chatbot, add a Website URL source, wait for it to reach Ready, test in Preview, then copy the embed code from the Deploy settings or share the hosted chat page link.
- Do I need to know how to code to add an AI chatbot to my website?
- No. With Chyt.ai, creating the chatbot, crawling your website and testing answers all happen in the dashboard. The only technical step is pasting one embed snippet before the closing body tag of your site or into your website builder's custom-code area. If you would rather not touch your site at all, you can share the hosted standalone chat page instead.
- Is a website chatbot the same as a custom ChatGPT for my website?
- It is the same idea. The AI model provides the conversational ability, and retrieval-augmented generation supplies facts from your own pages and documents, so answers are grounded in your content and shown with source citations. Chyt.ai does not retrain a model on your data; it indexes your content and retrieves the relevant parts for each question.
- How many pages can Chyt.ai crawl from a website?
- A website source in Chyt.ai accepts a maximum page setting between 1 and 500, and your workspace's resource allowance also applies. You can include subdomains, exclude paths you do not want indexed, and add further website sources or documents for content outside that scope.
- How does the chatbot stay up to date when my website changes?
- In Chyt.ai each website source has a sync schedule of daily, weekly or monthly, plus a manual Re-sync action and a sync history showing pages, changes and errors. Scheduled updates are periodic rather than instant, so after an important change it is worth re-syncing manually and retesting the affected questions. Uploaded documents must be replaced explicitly with the new version.
- What if the chatbot gives a wrong answer?
- First check whether the correct fact exists in a Ready source; most wrong answers trace back to missing, outdated or contradictory content. In Chyt.ai you can then add a focused Q&A entry, use Correct this answer on the conversation, or adjust retrieval settings one at a time. No AI chatbot is guaranteed to be right every time, so review transcripts regularly and keep a route to a human for important questions.
See it with your own content
Build a demo chatbot from your website or files in a few minutes, or start a free trial and design your first flow.